It's no secret that I love arts and crafts - almost as much as this delightful woman does.
Crafting is therapeutic for me, and gives me a sense of control and ownership when everything else seems to be far beyond my grasp. And let's be real, making my own stuff costs a lot less than buying it. Case in point: patches. Everyone loves patches, but the ones I like always go on the wish list because $6 for a tiny ornament to go on the back of my jacket where my bookbag will cover it just seems a little excessive. So for all my readers who find themselves in a similar predicament, or who just can't find the patch they want and would rather make their own, you're in luck! Here's a fun way of making your own patches that is sure to test your patience (but is so satisfying in the end!):
What you need:
Scissors
Felt in white or desired pastels (the more complex your design is, the lighter the felt should be)
Mod Podge or similar découpage glue
A design of your choice, or a printout of these designs
Coconut oil or other clear plant-based oil (optional)
Paintbrush
Hot glue gun and glue (optional)
Pin fastener (optional)
Step One:
Choose your design. If you'd like to make these awesome Ailurophelle patches, click here to download the designs, adjust the sizes to your preferences, and print.
If you'd like to use a design of your own, make sure you reverse the image horizontally so you have a mirror image of your desired design. If it seems weird, remember that the theme of this tutorial is mystery and surprises. Everything will come together in the end!
Step Two:
Print your design and cut it out. Try to have as little border space around the image as possible. This makes everything look a little neater at the end.
Step Three:
Cut out your felt in the shape you'd like your patch to be. Make sure your whole design fits onto the felt. If it's a little too big or too sloppy, don't worry too much, because you'll be able to trim it later.
Step Four:
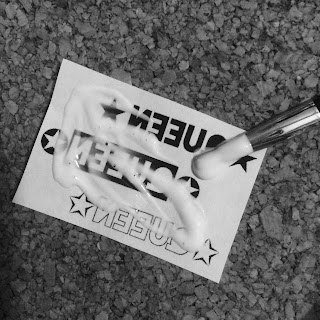
Apply Mod Podge directly to the image, right on the printed side. Use a paintbrush and make sure you cover the whole image and edges.
Step Five:
Press the felt and the glued side of the image together. It's going to look backwards and you're going to ask me why on earth you'd do such a silly thing because you won't even be able to see the cool design you picked out. Why did I make you glue your picture face down onto a piece of felt? Worry not! This is just the beginning! Everything will make sense soon.
Step Six:
Wait for the glue to dry completely. This could take quite a while, depending on the size of your patch, so I recommend you distract yourself for at least five hours, or take the night off and come back in the morning. Yep, I just said that. The easiest way of ruining your rad patches is not letting the glue dry.
Step Seven:
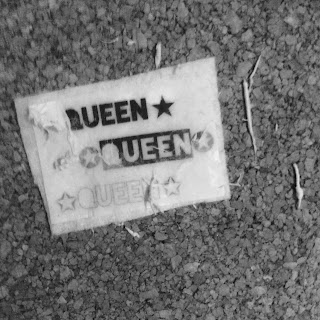
Good morning! Welcome back! Grab your dry, blank looking patch and get the paper covering up your cool design nice and wet. The standard protocol here is to use a damp washcloth. If you want to go the punk route, give it a lick at your own risk. No one will know. Your design will start to peep through.
Step Eight:
Rub the paper with your finger until it starts to roll up and peel off. Don't rub the design off, just rub away the excess layers of paper until you can see it clearly. Things are going to start to make sense now.
Finishing Touches:
At this point, you'll have a nice, fuzzy felt patch to adorn just about anything with. If your design is just a little too fuzzy for you, you can touch it up with some liquid coconut oil (or other clear oil), then dab it off. If you'd like to seal your design and make it extra permanent, top it off with a layer of Mod Podge, wait 15 minutes, and then repeat once or twice. If you'd like to make it a pin, grab your hot glue gun and glue a pin fastening to the back. Other embellishments can be made to your taste as well (rhinestones, stitching on a border with pretty thread, etc). After the first few you make, you'll be a pro--and you'll get to share the magic and mystery with all of your friends.


Comments